
 Trion Trim-T Air Cleaner Repair Help
Trion Electronic Air Cleaner Troubleshooting
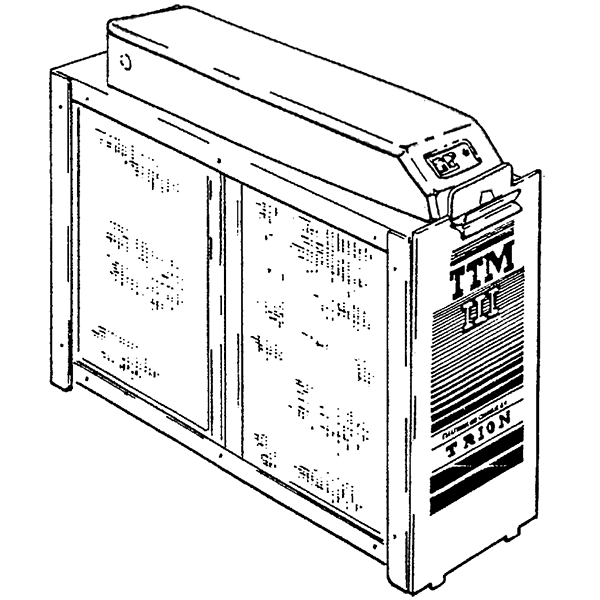
Hi, I'm Jay, and this is the Trion HE 1400 Electronic Air Cleaner.
Let's talk about what "normal" is for these electronic air cleaners. So, the way the things work is air from your home is sucked down this duct, this is called the "return air duct" so air comes down this way, makes a turn, it goes through the pre-filters first, this particular air cleaner has two pre-filters in it, so the air goes through the pre-filters. The pre-filters don't actually clean the air, what they are meant to do is protect the air cleaner. They will catch things like baseball cards and bubblegum wrappers, birds, very LARGE items, but they are not going to catch small particles. The smaller particles are meant to be caught by the collector cells. So again, air comes down here, dirty air, air comes down in, and through the pre-filters, then it goes into the collector cells where it cleans the air, removes any particles from the air, it goes into the furnace, and then it gets redistributed throughout the home. That's normal.
So right now this thing is on, we have the blower running. You can see there is a green light, and a red light, and they are both lit. So, it is functional. Now, a really easy way to determine, to test to see "is it actually working?" would be to take the return air duct work, slap it, and what that will do is knock some larger particles lose that might be hanging on the inside of this duct work with dirt, and it will get sucked into the air cleaner and short out the cells temporarily, and it will make some snapping sounds. So, let's just try that.
OK, so, uh, did you hear those snapping sounds? That was, again, large particles getting sucked into the air cleaner, and shorting it out temporarily. Now, often when that happens, the red light will flicker just a little bit, but that's normal operation. so, right now, we're not beating on the duct work, the air cleaner is running perfect, both lights are lit, the red and the green, and it's doing what it's supposed to be doing. So now we're going to start talking about what happens if one or both of these lights are NOT lit.
OK, so now we have our demo unit set up where the green light is lit, the red light is not, and the fan is on. So we're moving air through the unit, we have the air flow sensor calibrated, which I'll talk about later, and we have no red light. So that means likely there is something going on inside of the power box, or more likely, the collector cells. So what we're going to do, is pull both collector cells out, and do a quick test.
OK, so now we're going to test the cells. We have a green light lit, the red is out, we're going to turn the power off to the air cleaner, and pull out the cells. There's one. And the second one. OK, now that the cells are out we're going to put the door back on, and we're going to test the unit to see if the red light comes back on. Ah, OK. So we have the green light, and a red light, they're both on, we have the fan in the off position right now, and the red light was on there for a minute, OK so now it's off, so now we're going to turn the fan into the "on" position, and see if this red light comes on.
So we turned the fan back on, on the furnace, after this thing calibrated right here. And the red light came back on, so fan on, the red light is off, we're going to turn the fan off again and see what happens to the lights here, see where they should go is green lights on, red light shuts off. So let's try that. OK, so we turned the fan off, and once it spun down, the red light shut off, so it's working perfectly without the cells. So next thing is, we're going to test the cells, one at a time.
So, we're going to turn off the air cleaner. Pull the door off. Install a single cell, all the way to the back. OK, again, we're doing these tests with the fan in the off position, because this particular cleaner has an air flow sensor built into it, and it's electronic, so it calibrates with the fan in the "off" position. So, let's just see here. Let's see if this red light comes on. OK, green light and red light both come on. Which means, that cell is fine. So now we're going to take that cell out and test the second cell.
Alright, so let's trade cells. We'll turn the power off, take the door off, remove this cell, we know that cell is good, let's try this one. Again, we're going to push it all the way to the back, put the door back on, and we're going to turn it on, see what happens. OK, the green light is lit, the red light there flickered for a second and then turned off. Let's try it again here. OK, like I said the red light flickered for a second and then it turned back off. And it made a humming noise, so we have a problem with this cell, so we're going to figure out what the problem with this cell is.
Alright, so we're going to turn the power off to the unit, take the cell out, and closely inspect it.
Alright, so this is the cell that was acting up. So we're going to inspect it real closely, and we're going to look for things like bent fins, OK. One of the things that's common is in the process of washing these cells, one of these little corners will get bent. So, the fins all need to be parallel to each other, nice and straight, no bent corners, no wavy plates. Nothing lose and no obstructions in between the plates. We're going to let go of that side and the other side here.
Now on this side, we'll test the ionizing wires in it. So we're going to make sure there's a wire between each of these spaces, and there is, there are wavy little very thin hard wires that look like piano wires, they're called ionizing wires, but they're between each of these sections. And sometimes one of these wires will break, and it will be flopping around, and part of it will be stuck between the plates, shorting it out. These are all intact, but I do see an obstruction down here, there is way down in there a cricket. Looks like a dead body. So let's just turn this around and see if we can get to him.
OK, so right here we have what appears to be a cricket. I'm just going to flick him out of there. Alright, he's gone. And that's the only thing I was able to see. On this side is what appeared to be a dead cricket, stuck between two of the plates. OK. Now that we've removed the dead cricket, we're going to put it back in there and we're going to test it again, to make sure we have resolved any issues with this particular cell. So let's do that. Again all the way to the back of the air cleaner. And we'll put the door back on, the fan is off on the blower, we're going to turn this on just to see what happens.
OK, both lights came on, there's no buzzing noise, no snapping noise, no nothing. So, oh. There it is. It just snapped once. OK, perfect. So, this cell is now in working order. So now we have this cell prepared, this cell there was nothing wrong with, so we can turn it off, put the other cell in, and test the assembly complete.
Alright, so we're going to turn the unit off. Get the other cell in here. Alright, both cells are in, both pre-filters are in there, we're going to turn it on. Perfect. No loud snapping noises, both lights are lit, again the fan is off right now, because we have an electronic air flow sensor on this one. Um, and it just timed out so they just calibrated. So, if we get this blower running again, this light should come on, and everything should take off and run, so let's do that now. We're going to get the fan in the on position.
OK, I've just turned on the fan and the red light came on. So, both lights are lit, and it's working perfect. This particular air cleaner has an electronic sensor in it and that's an air flow sensor. And it needs to be calibrated, it's calibrated every time the power is turned on or off to this thing, every time there is a power outage, every time you remove the door, put the door back on, it goes into a re-calibration mode. So, here's how that works. So, i'm going to turn this thing off, right now the blowers turned off, the air cleaner's turned off, I'm going to leave it off for a minute here and we're going to turn it back on and let it calibrate. So, air cleaner is on, both lights came on, and right now this air flow sensor is re-calibrating, and when it's done-there we go. OK, to the red light just turned off, so the green light's on, red light's off, so it has re-calibrated to what it believes is this is what it looks like, when no air is moving through the air cleaner. So, it's perfect right now.
So if we turn the furnace blower on, this light should come on, so let's just do that real quick. There we are. So, OK, the red light just came on, green light is still lit, and it has just realized that the furnace blower is running. Now, the way it does that, is there's a hole right here, on this particular model. On some of the other models, there's a whole on the side. But this one has it in the front. When air passes through there, after it's, again after you calibrate it, when air passes through there, it blows across the little sensor, and it cools the sensor off so that it knows, something has changed and it turns on the air cleaner. There are different types of air flow sensors. Not every electronic air cleaner has an air flow sensor. Some of them, some of the Trion units are shipped minus an air flow sensor. Some of them are set up, if they don't have an air flow sensor, they're typically wired to the furnace, so that they're only getting power when the furnace blower is on.
There are mechanical air flow sensors, and they have a little diaphragm in them, and the way they work is anytime they see a negative air pressure here in the duct work, they will click and turn the air cleaner on. With them, with the mechanical ones, the diaphragm ones, there is no calibration necessary. It just works. So with those, you can do anything you want, turn the power on, turn the power off, they always function with the air cleaner on, when there's native pressure here. If you determine that the problem is not with the collector cells, but the problem is actually with the power supply, then we offer a diagnostic service. So for the diagnostic service, what you want to do is take this power supply box here and ship it to us. So I'm going to show you how you remove it easily on this particular model.
Be sure to turn the power off, before performing any maintenance.
Alright, now that we've confirmed that the power is off to the furnace and air cleaner, we're going to take the door off, and in this model, there are two small screws underneath here. Earlier versions of this air cleaner had a screw here on the front, this one has it underneath, so we're going to take a Phillips screwdriver. Now, we've already unplugged the air cleaner, we're just going to lift up gently and pull it forward, and we'll lift it out.
Alright, so, here's the power box. This is what you send us. Just wrap it up like this, purchase the diagnostic service from us online, and include a copy of your order number with this, so we know whose it is when we get it, and once we receive it, we will test it and we will contact you to let you know what parts in it are faulty, if any. If you have sent us your power supply for testing, and we sent it back to you, here's how you put it back together. So we're going to just unravel that, get the wires in the back there, now, in the back of this particular power box, there's a little tab here. That tab goes into a slot that goes back into the air cleaner cabinet. So, we're going to gently get it back here, and we're going to confirm-yep, we're going to slide it into the back. And we have two screws here, we will put that back in it. We'll put the pre-filter back in. So those pre-filters are in there. Here's the second collector cell, put the door back on, and all we have to do is turn it on and let it calibrate.
Thanks for watching. For additional help or questions, feel free to contact us.
Trion Electronic Air Cleaner Maintenance
Hi, I'm Jay, and this is the Trion electronic air cleaner. Now this model happens to be the HE1400, but maintenance on all electronic air cleaners is the same. Now that needs to be done every 1-6 months. And that's what we are going to do today.
OK, so first thing we want to do is turn off the power to everything.
Be sure to turn the power off before performing any maintenance.
OK, now that the power is turned off, we're going to remove the guts from this thing. So, here we go. Now this particular model happens to have two collector cells and two pre-filters but no charcoal after-filters. The charcoal after-filters are not washable, or cleanable, you want to replace those, just throw them away, every 90 days, if you have them. Now some units may have two collector cells and one pre-filter that's large or you might even have a dinky little unit that has one collector cell and one pre-filter. Again, this one has two and two, so we're going to get them all out. OK, now that everything is out, let's go wash them.
OK, now we're at the laundry sink. A lot of these things say that you can put these things in a dishwasher, I've never been a big fan of that, so I like to do it the old fashion way. So what we're going to do is fill this sink up with some hot water and we're going to add some electric dish washing detergent to it. About half a cup.
Alright, so now that our sunk is full of water, we're going to add about half a cup of detergent. Alright, that's good. Now I'm going to stir it up until it's dissolved. Alright, now let's add the collector cells one at a time. We're going to put them at the bottom. And here's the second. Now, add our pre-filters. And that's it. Now we're going to let this whole thing soak for about 30 minutes. Then we're going to take it outside and rinse it off.
Now it's time to rinse off the cells and the pre-filters. I've taken them outside, you can do it inside, but I just find it easier to bring them outside. As far as rinsing off the cells goes you can be fairly aggressive with the garden hose in rinsing them off, you don't want to get too wild. But, normal water pressure you can kind of just rinse these things off real good with fresh water.
Now that the collector cells are rinsed off, it's time to do the pre-filters. You want to be very careful with them, you can't rinse them off with a lot of pressure, so I like to adjust the nozzle, so that it's kind of in a spray pattern. Then, carefully rinse them off really well with fresh water, and let them drip dry.
Now that we've washed everything, let's put it all back together. Now it's important that you put them in properly. There's an arrow here printed on the edge of the collector cells. And that arrow points towards the furnace always. So here's the arrow, pointing that way, that's how we're going to put them in. So, there's one. And there's the arrow again. The second one. Pre-filters. They always go before the collector cells. So the air goes through the pre-filters, into the collector cells, and into the furnace. So since that air flow is this way, pre-filters on this side. Even though they'll fit on this side, that's not where they'll go.
Now, if your air cleaner happens to be mounted on the other side of the furnace, of course the arrow would be pointing this way, towards me, uh, towards the furnace, the pre-filters would of course go on the opposite side. Again, the air on this set up here comes down here goes through the pre-filters, goes through the collector cells, into the unit. Now, put the door back on, and at this point we can turn the power back on to the air cleaner, and then turn the power back on to the furnace, if the cells are not 100 percent dry, it's either not going to work, or it's going to make some snapping sounds, because it will take up to 24 hours to get those cells to be completely dry before they'll start working properly.
So there we go. It's on, it's not snapping like mad, both lights are lit, so everything is good. Now this particular one happens to have an air flow sensor in it, it's now calibrating. So, once this is done calibrating, then this red light will turn off, this green light will start on on this particular model, then we can fire our thermos or our air conditioner back up, and complete testing this thing to make sure it is properly working. OK, so the light's out. If we get out furnace blower running again, this red light will come on and away we go.
Thanks for watching! For additional help or questions, feel free to contact us.
Trion Air Bear Filters - Converting From Electronic To Media Style Filters
Hi, I'm Jay. And these are Trion Air Bear Filters. We have three different sizes sitting here, they're available in three different efficiency ratings.
So we have "Merv 8," "Merv 11," which is what these happen to be, and also "Merv 13." So you have three different efficiency ratings. The difference between these, is in how efficient this filter media is. So, the higher this number, the more efficient the air filter is. And what that really means is a "Merv 13" filter will capture a much smaller particle, than a "Merv 8" will. So, they'll all catch lint but the "Merv 13" being the highest efficiency of these three that we're talking about today will catch a much smaller particle than the "Merv 8" will. So, these filters will go into a Trion "Air Bear" air cleaner, you can also convert, if you want to, a Trion Electronic Air Cleaner which is what this happens to be in our demonstration unit.
You can convert one to an electronic style to a media style air cleaner, so we're going to talk a little bit about that and also changing out the filter is the exact same if you have a normal Trion Air Bear air cleaner, or an electronic air cleaner, or if you don't have a Trion and you happen to have some other brand of air cleaner, that happens to fit these filters, they will fit in most air cleaners that use a five inch thick filter media.
Be sure to turn the power off before performing any maintenance.
Alright, first thing we are going to do is remove the door. And the cells. Now, the two pre-filters. OK, now, we've already removed this item. This is the cell key, and it's a little nylon piece that inserts back inside of here. It's held in with a small screw. And if you're going to convert a Trion electronic air cleaner that has the cells in it to use the disposable media, you'll need to remove this little cell key. It's done with a little screw driver, and you just, after the screw is removed from the center of it, and just pop it straight up. And we're just gonna put her on the side here, keep it out of the way.
So now that that's there, out of the way, we can go ahead and install the filter. Now, as I mentioned, this happens to be a Trion Electronic air cleaner, if you have a basic Trion Air Bear cleaner, yours will look just like this, but it won't have this top part. The door will be a hair shorter, because it won't have to come up this high.
So, your door will stop here, and again, you won't have this top piece. And we have this thing turned off, so, this one happens to be a 20 x 20, so, uh, so there is an arrow on here that says "air flow." We're going to have that always pointing towards the furnace, this is our furnace here, so we're going to slide it in with the arrow pointing this way. And it slides right in. There is a little bit of friction, because it has these foam strips on it. To make it basically air tight. So that slides in there. And here's our door. And that's it.
So we have now converted this air cleaner from an electronic air cleaner to using disposable filter media. It is important that this filter media be replaced, a minimum of every six months if you have heating and air conditioning. If you only have air conditioning, or only heating, then it would be a minimum of once a year. Most people have heating and air, so for them, it's a minimum of twice a year. If you live in an environment where there is a lot of dust or dirt, say a farm, or near construction, or you have a lot of hairy creatures running around your home, then you may need to replace your filter more often, but for the typical person, twice a year is sufficient.
Thanks for watching. For additional help, or questions, feel free to contact us.
Trion Ionizing Wire Overview
Hi, I'm Jay, and this is a Trion Ionizing wire. They are shipped looking like a little brass spring with two ends glued on to them. At first you need to, before you install these, is to carefully stretch them out. Now you want to be kind of careful about this because if you overstretch them you'll break it. If you do it like this, and it still kind of looks curly, and that's fine, that's how they look. And the curls, the purpose of that, is to keep it hot inside the collector cell cabinet.
Replacement is easy. Here's how.
You can convert one to an electronic style to a media style air cleaner, so we're going to talk a little bit about that and also changing out the filter is the exact same if you have a normal Trion Air Bear air cleaner, or an electronic air cleaner, or if you don't have a Trion and you happen to have some other brand of air cleaner, that happens to fit these filters, they will fit in most air cleaners that use a five inch thick filter media.
Be sure to turn the power off before performing any maintenance.
Thanks for watching. For additional help or questions, feel free to contact us.
Trion Air Cleaners - Finding The Model Number
Hi, I'm Jay. And today I'm going to talk about; how to determine the model number for your Trion air cleaner.
Now, this one happens to be a Trion HE Plus 1400, it's on the door. If your door does not have that here, sometimes on the back side of the door, there is a sticker and this one happens to say "HE Plus 20x20," that's the size of the cabinet here, not counting this power box, AFS. The AFS means that is has an "air flow sensor." But the important thing is that it's an HE plus, 20 x 20.
Now, this one has collector cells in it, because it's an electronic air cleaner. If your electronic air cleaner has been converted, to using pleated filter media, then you won't have the collector cells in here, you will also not have these two pre-filters. Instead you'll have this slid inside of here. And what this is is a 20 x 20 x 5 Air Bear filter media, it fits perfectly inside of this cabinet.
If you happen to have an Air Bear cleaner, which means it's going to look just like this, minus these items that are inserted inside, it will also not have this power box on top, so it'll be from here down, look just like what you have minus this stuff, the door of course will be a little shorter and it will say, like, "Trion Air Bear" on it. And inside of it, will be a filter like this, again, this one happens to be a 20 x 20 x 5. The most common size for an air bear happens to be 20 x 25 x 5, but our demo unit here we happen to use the 20 x 20 x 5. It's available in multiple sizes, so pay attention to that. It's important that you order the right filter for your Air Bear air cleaner.
Thanks for watching. For additional help or questions, feel free to contact us.
FAQs
Trion HVAC System - Overview
Hi, I'm Jay. And this is our demonstration unit.
We have Trion equipment on here so we're going to talk about what a typical system might look like in your home. So, right here we have return air duct work, and there's a grill inside of this one, but typically the duct work would get attached to the return air duct work in your home but this is the drop, so we have the return air, which would be in the summertime, hot air, from your house, and in the wintertime, cold air.
So the air would pass down here, turn, go through the air cleaner, so this happens to be a Trion electronic air cleaner so the air would go through here, get cleaned, then the air passes into the furnace. there's a blower hiding inside here. So that air gets blown up through here.
This section here hiding heat exchanger so this is where the air in the winter time would get warmed up. The air would then blow up here, this happens to be a cooling coil. Now in the winter time, this doesn't do anything. In the summertime, this would then cool the air. The air would then pass up here into the supply plenum and get distributed into your home.
Now we happen to have a bypass style humidifier on this unit, so this is where you would humidify the air in the wintertime and kind of the way that works would be; winter time, hot air is blowing up here, that hot air is dry, it enters the humidifier, gets humidified, so then you have hot humid air that exits that humidifier, and in our demonstration unit we have a six inch round duct on this one that hiding around backside of this system but it comes around here and it steps back into this.
So you would have hot humid air coming from that six inch round pipe, it reenters the return air duct, and gets pulled back down, runs through the furnace and gets distributed back into the home. We also have a have a duct mounted humidistat, mounted either step which is right here. And I don't know if you can hear that but that's the humidifier going on and off. So this is quite commonly a location where the humidistat is mounted. You might have yours wall mounted but a real common location is on the duct work. Specifically on the return air duct work not the supplier duct work.
We have this mounted here we also happen to have a nest thermostat mounted on the duct work. Obviously you're not going to have a thermostat mounted on your duct work, but for a demonstration unit its just a nice place for us to have it so we can show people how to set their thermostat. But obviously yours will not be here, yours would be mounted on your wall somewhere typically in the hallway or living room. And that's about it.
Thanks for watching. For additional help or questions, feel free to contact us.
Documentation
Air Cleaner Diagnostic Service
Is your air cleaner not working? we offer a diagnostic service.
Still Need Help?
Live help is available. Feel free to contact us.
Browser Not Supported
You are using Internet Explorer as your browser, which is no longer supported by our website. Because of this, you can view products but not place orders using Internet Explorer on our site.
Please update your browser to any of the modern browsers listed below or use a different internet browser to place an order on this site.
If you have any questions or need assistance with placing an order, please contact us at 800-825-2148 or [email protected]


